 PARKMARKR
Get started in minutes
You only need to set up Parkmarkr once. After that, it works automatically every time you park.
Before you begin
Compatible device
Parkmarkr requires a compatible smartphone. Most modern iPhones and Android phones are supported. If your device is not compatible, the app will let you know during setup.
HDB multi-storey carpark
Parkmarkr is designed specifically for HDB multi-storey carparks (MSCP) in Singapore. Underground or single-level carparks are not supported for auto-detection.
Permissions you'll be asked for
Parkmarkr will ask for the following permissions during setup. Here's why each one is needed:
Location (Always)
So Parkmarkr can detect when you arrive at your carpark — even when the app is not open. This is what allows it to work completely in the background.
Physical activity (Android) / Motion & Fitness (iPhone)
To know when you've finished parking and started walking. This is what triggers the level detection.
Notifications
To send you an instant notification with your parking level after each session.
Anonymous uploads only — nothing identifies you. See our privacy policy for full details.
Setup walkthrough
Do this once, at the carpark you use most. You'll need to be there to capture the entrance — unless other Parkmarkr users have already set that carpark up, in which case the entrance is filled in for you and you can go straight to Finish.
-
 1
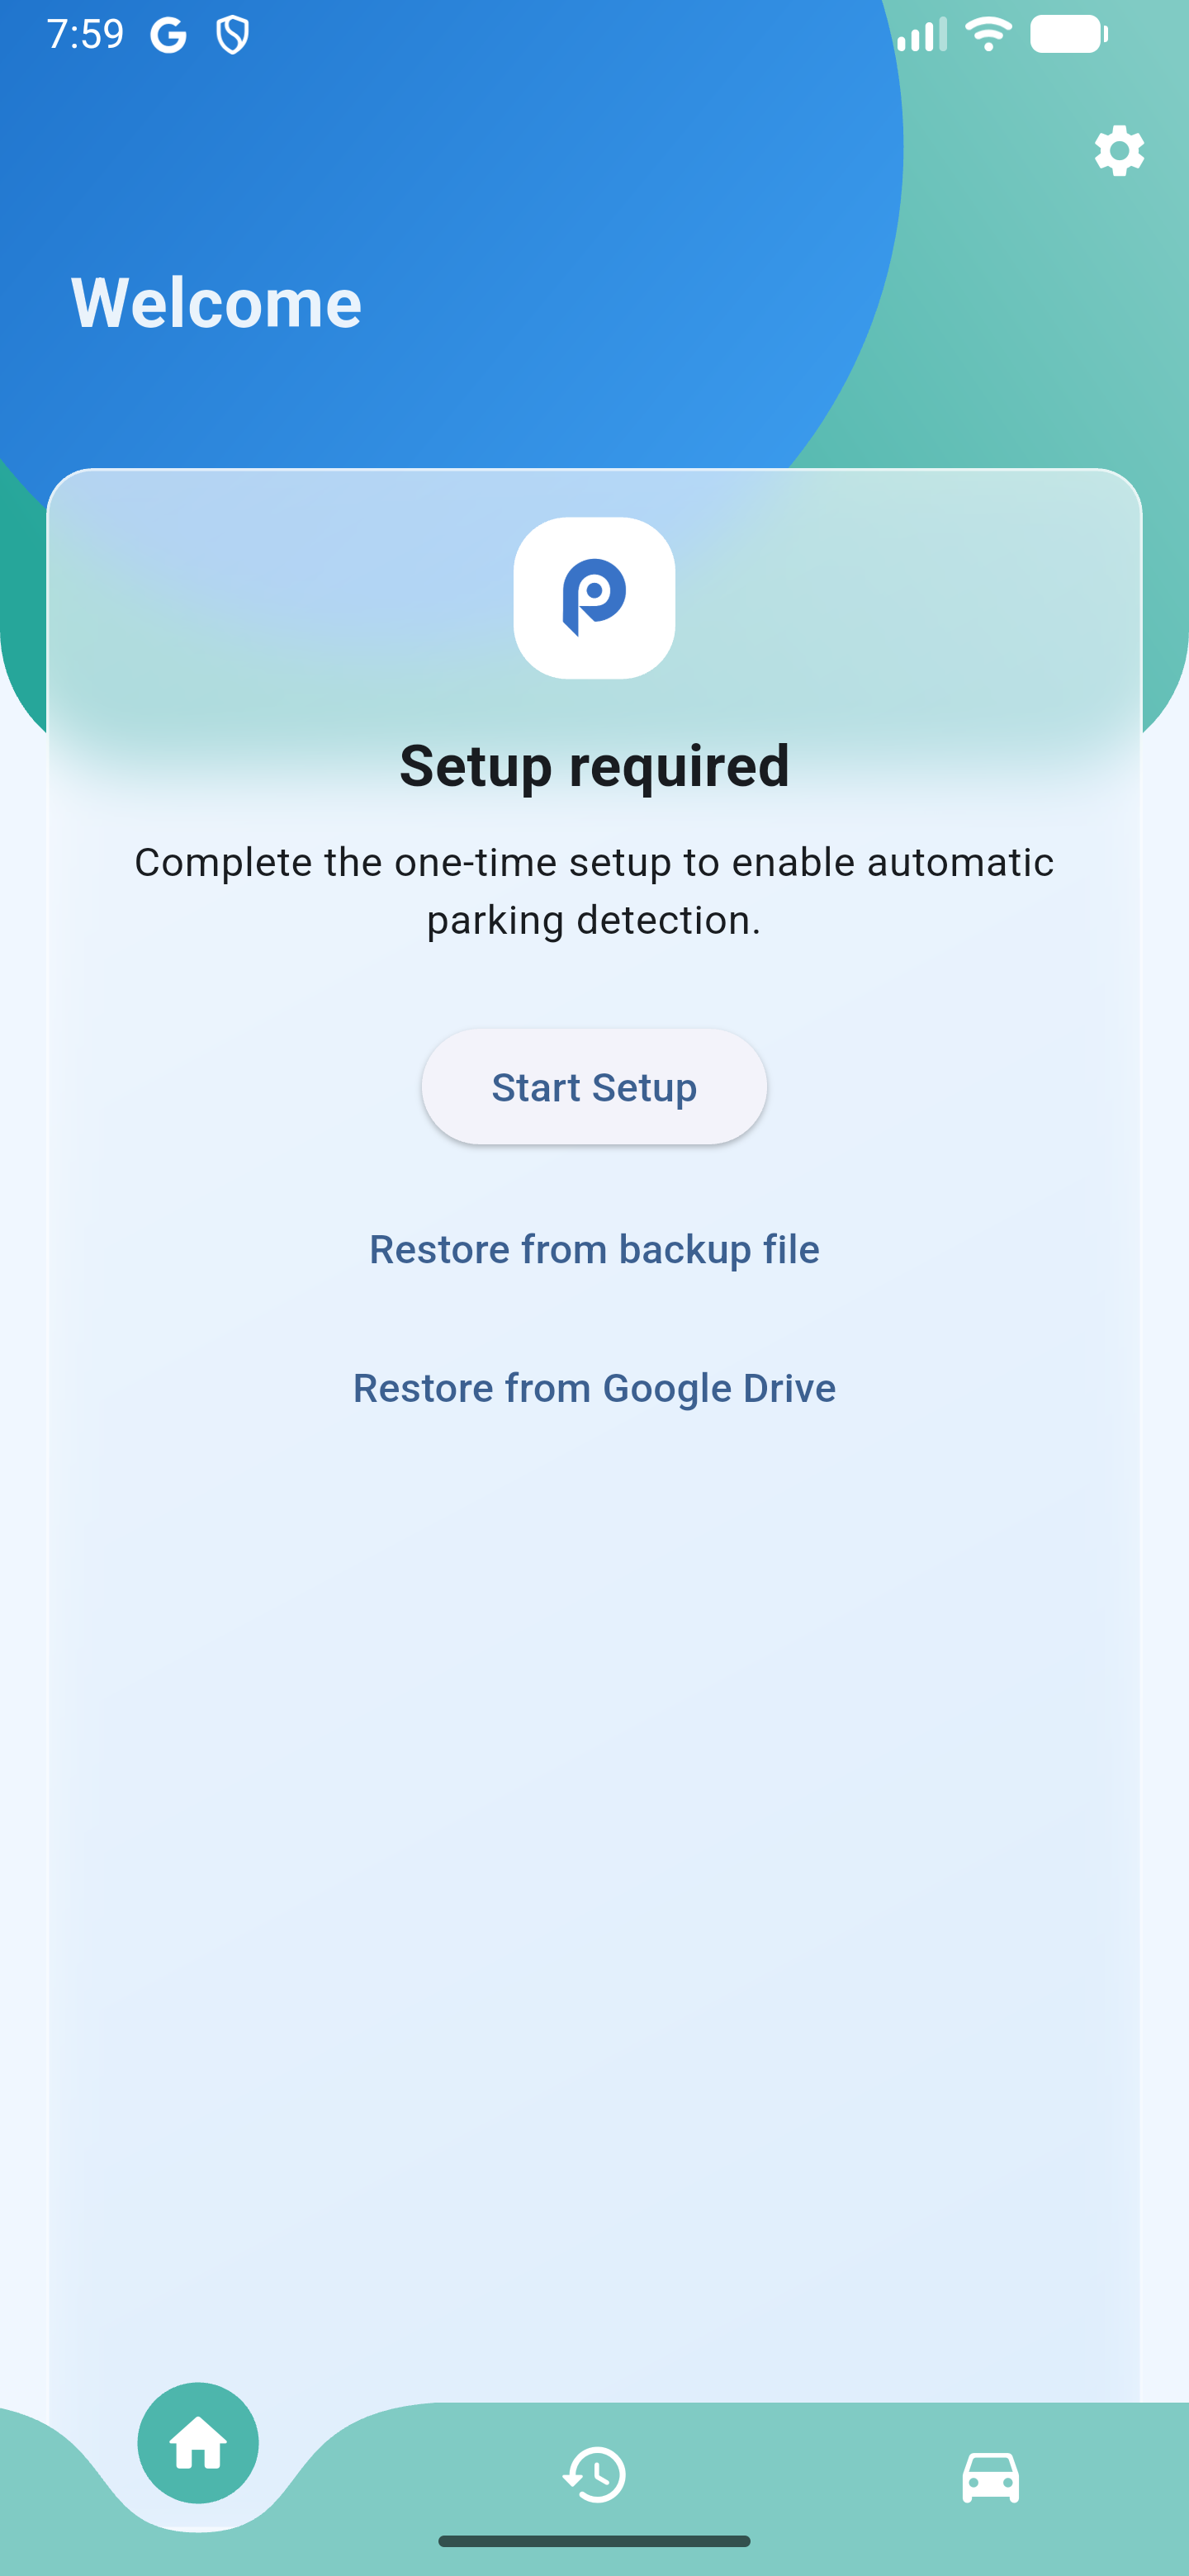
Open the app and tap "Start Setup"
On first launch you'll see a "Setup required" card. Auto-detection stays off until you finish the quick one-time setup.
🔎 Look for "Start Setup"
-
 2
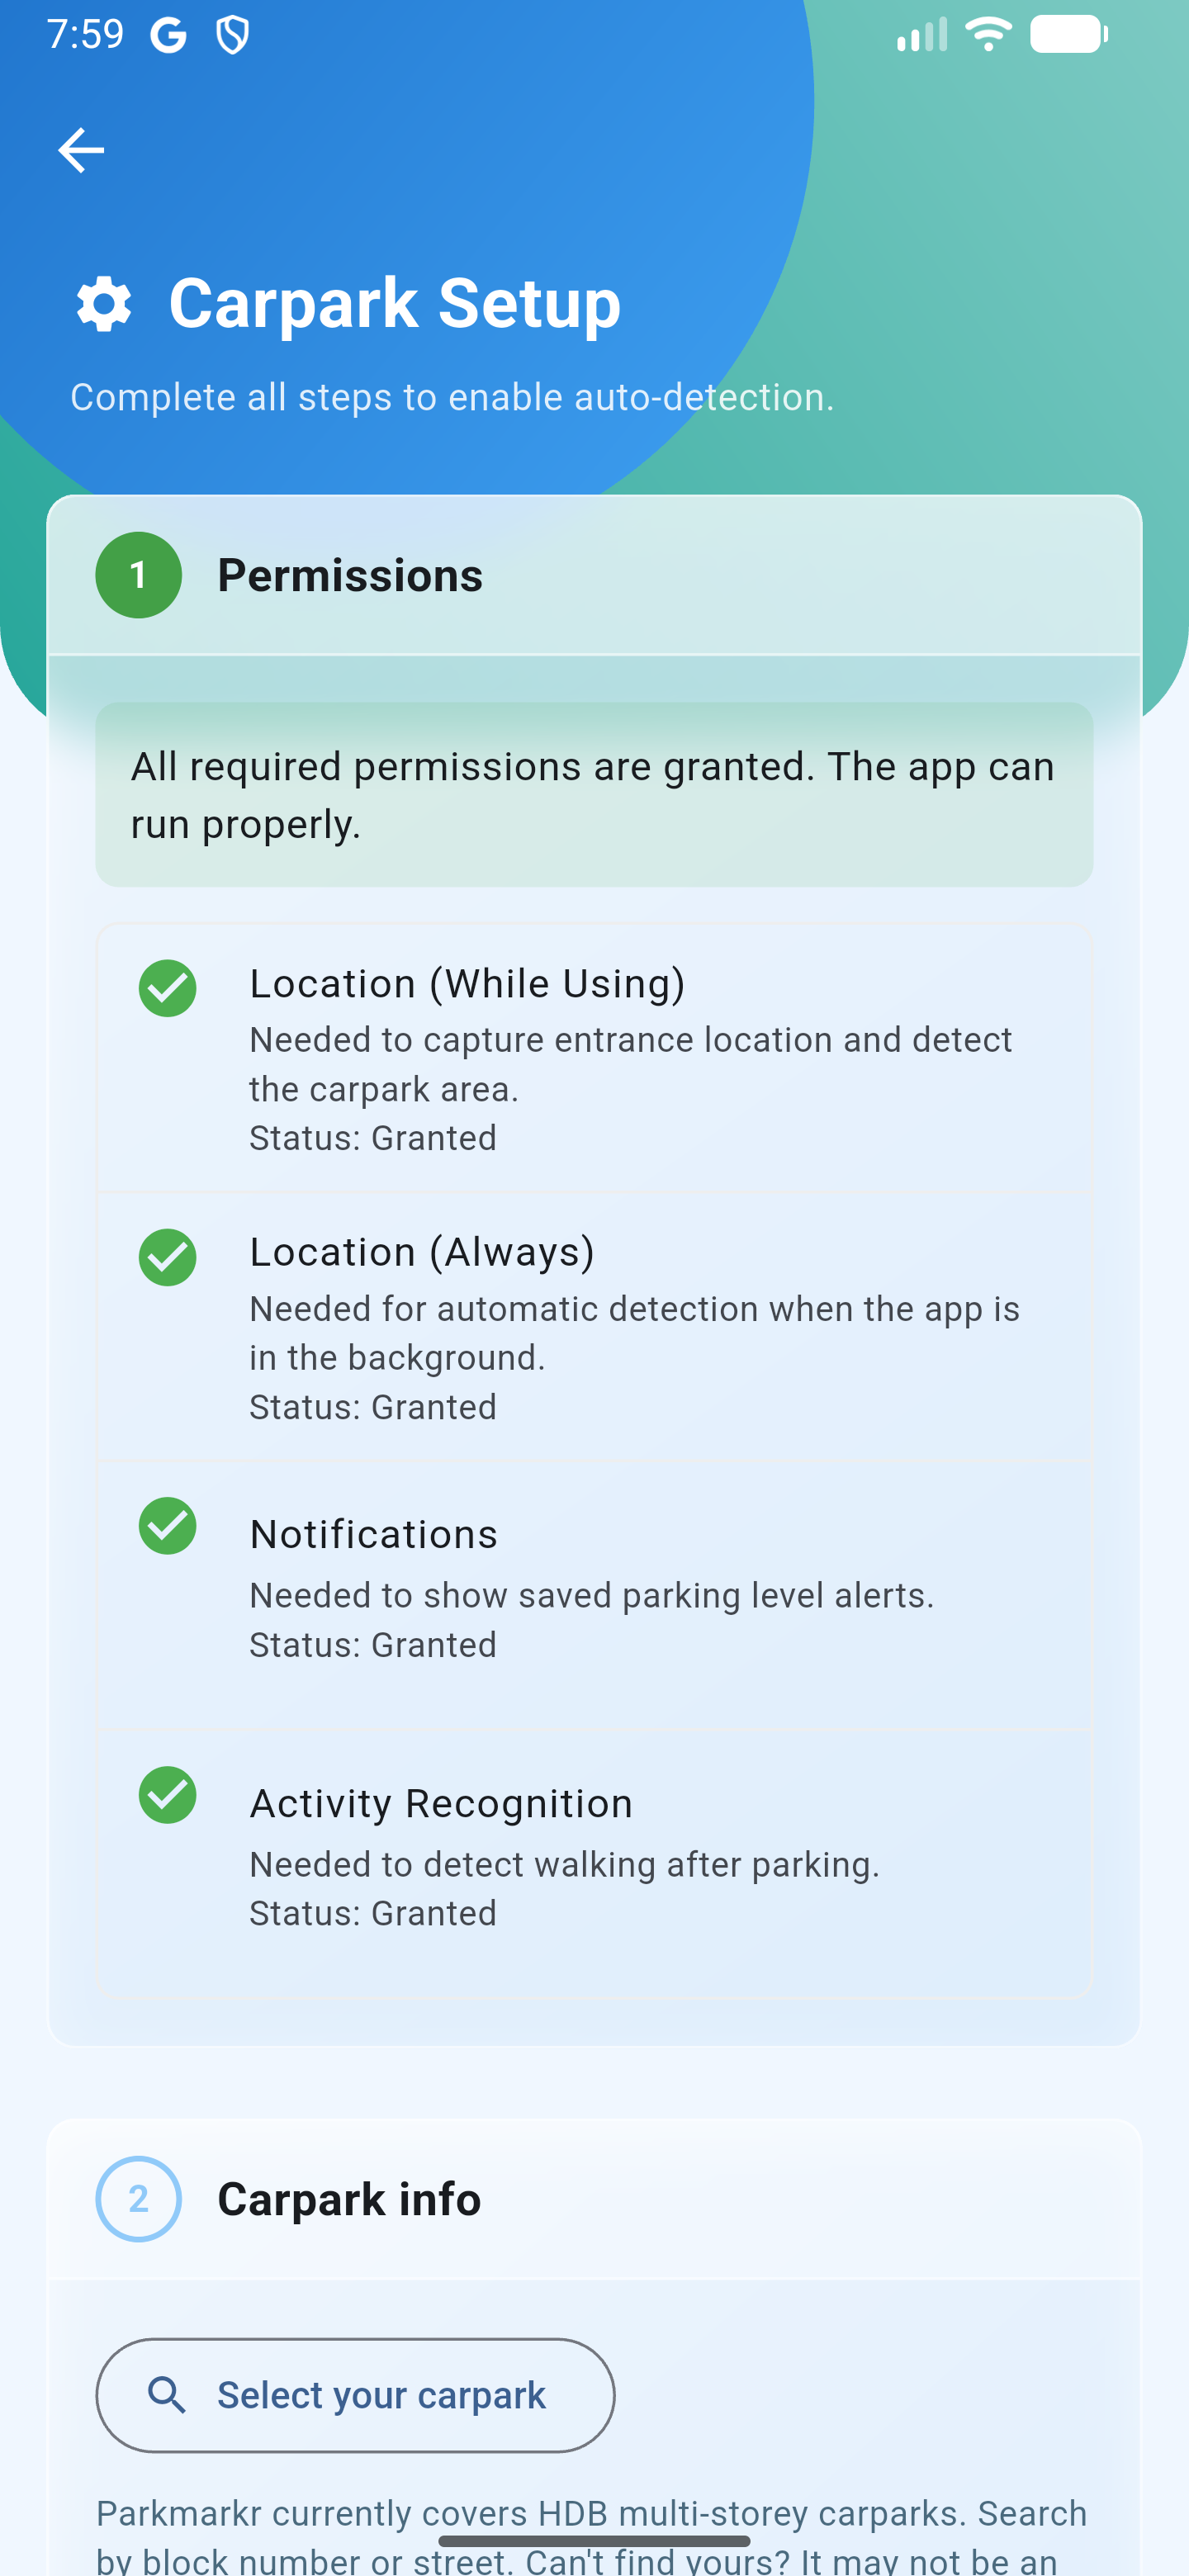
Allow the permissions
Tap "Request permissions" and accept each one: Location, physical activity / motion, and Notifications. They let Parkmarkr notice when you arrive and when you've parked — even when the app is closed.
🔎 Look for "Request permissions"
⭐Most important step: When the location prompt appears, choose "Allow all the time" (Android) or "Always" (iPhone). This is the one setting that lets Parkmarkr work after you've walked away — without it, detection won't run in the background.
-
 3
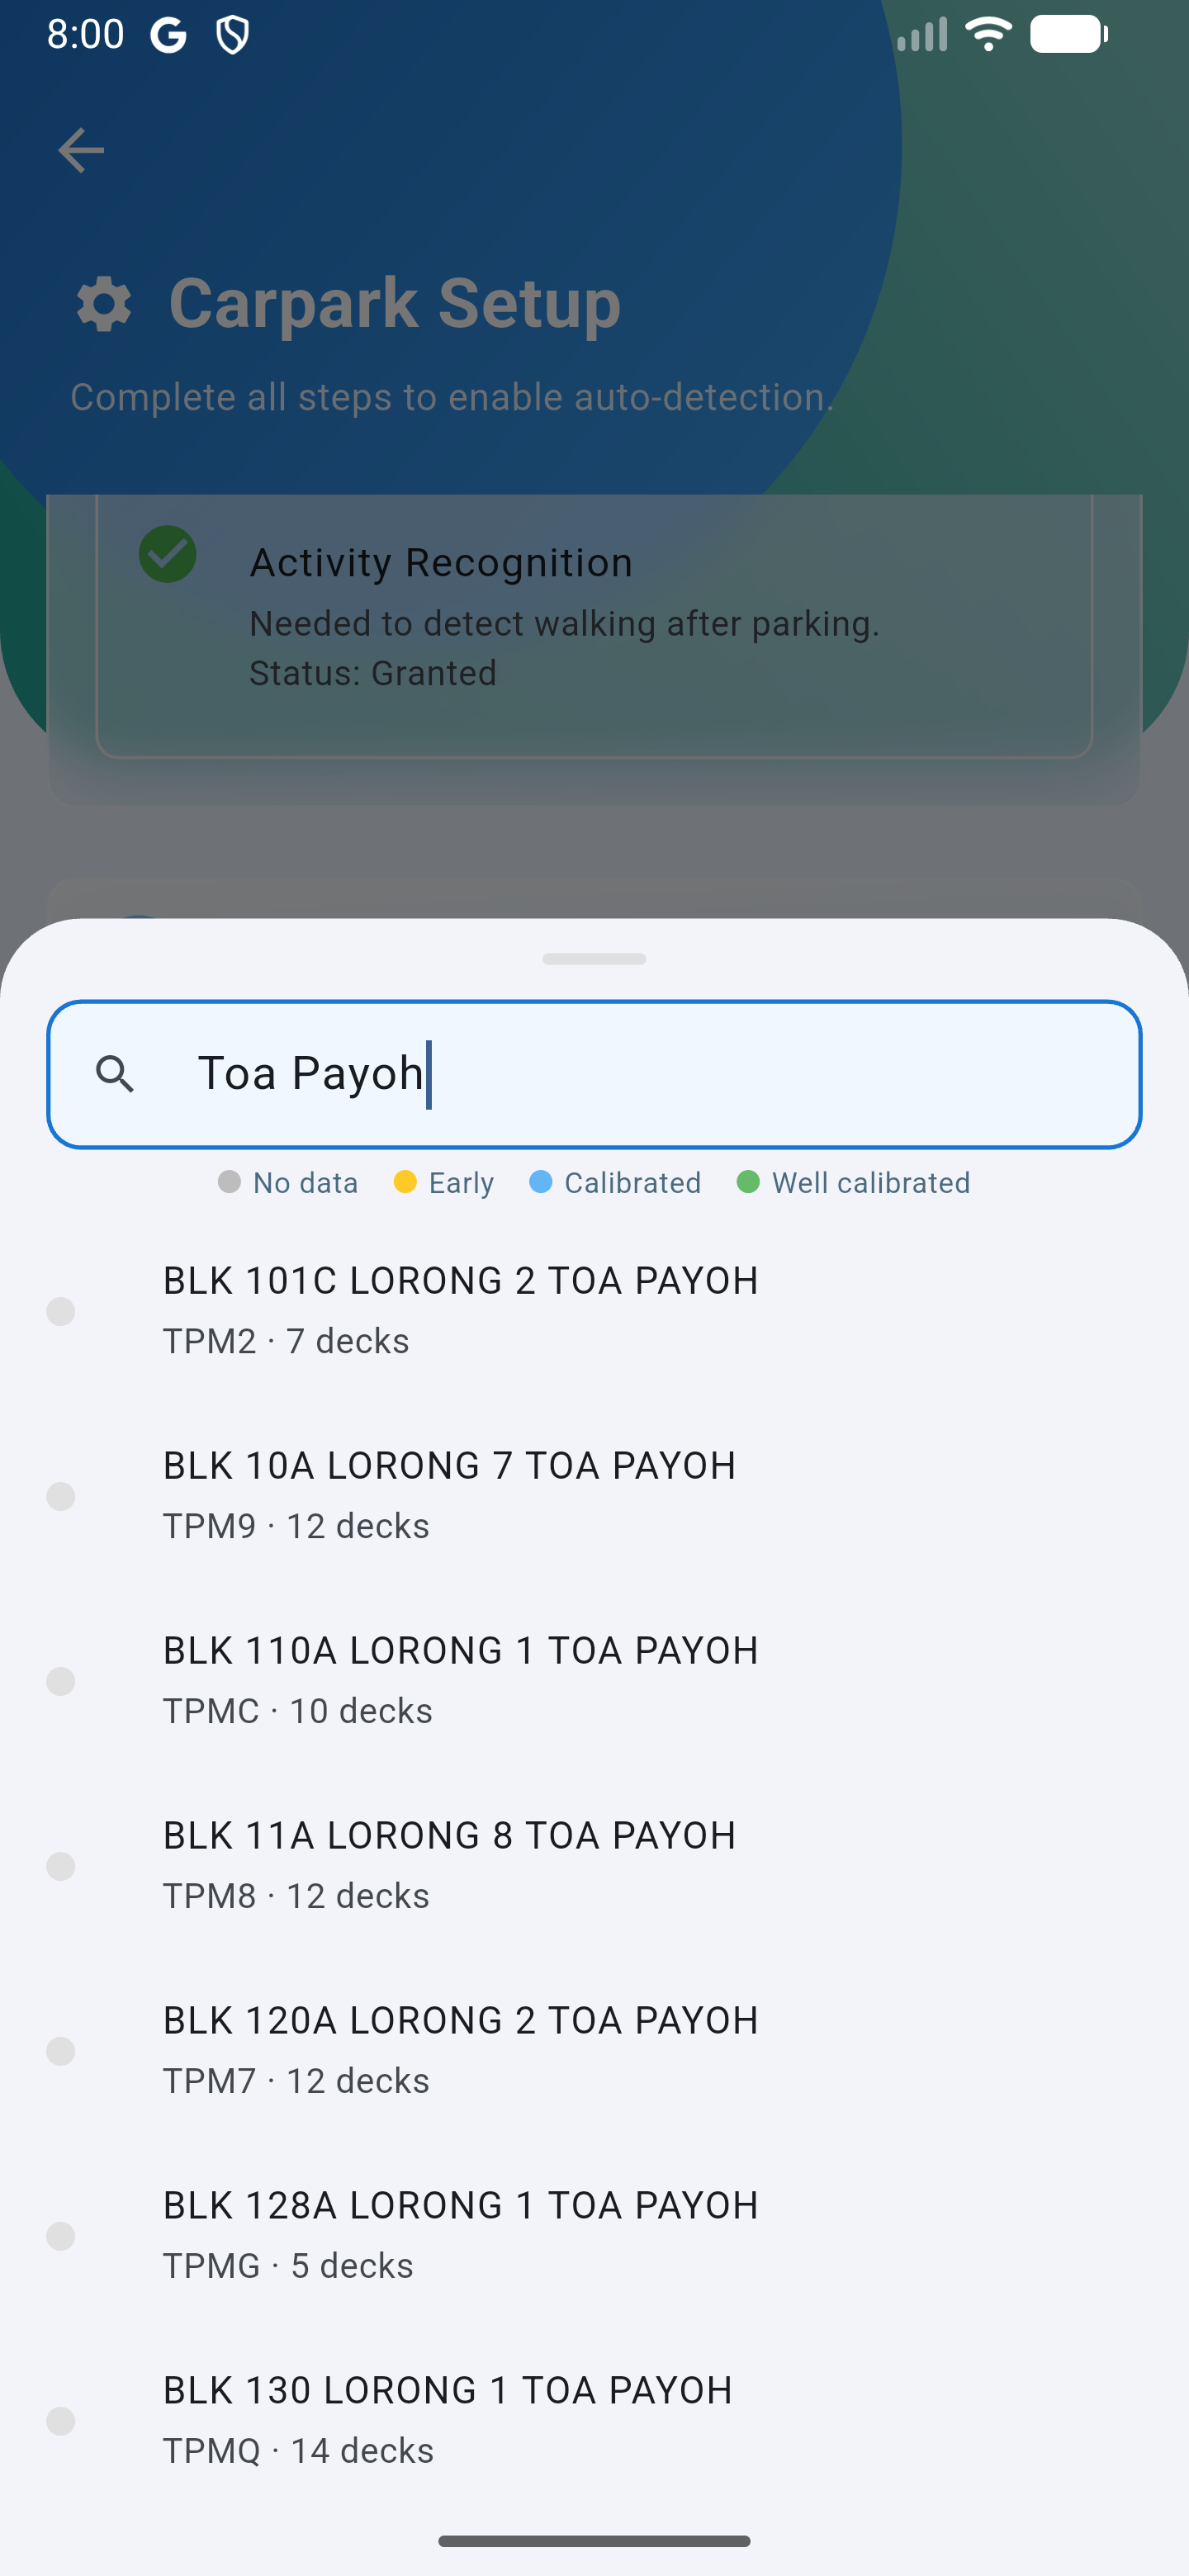
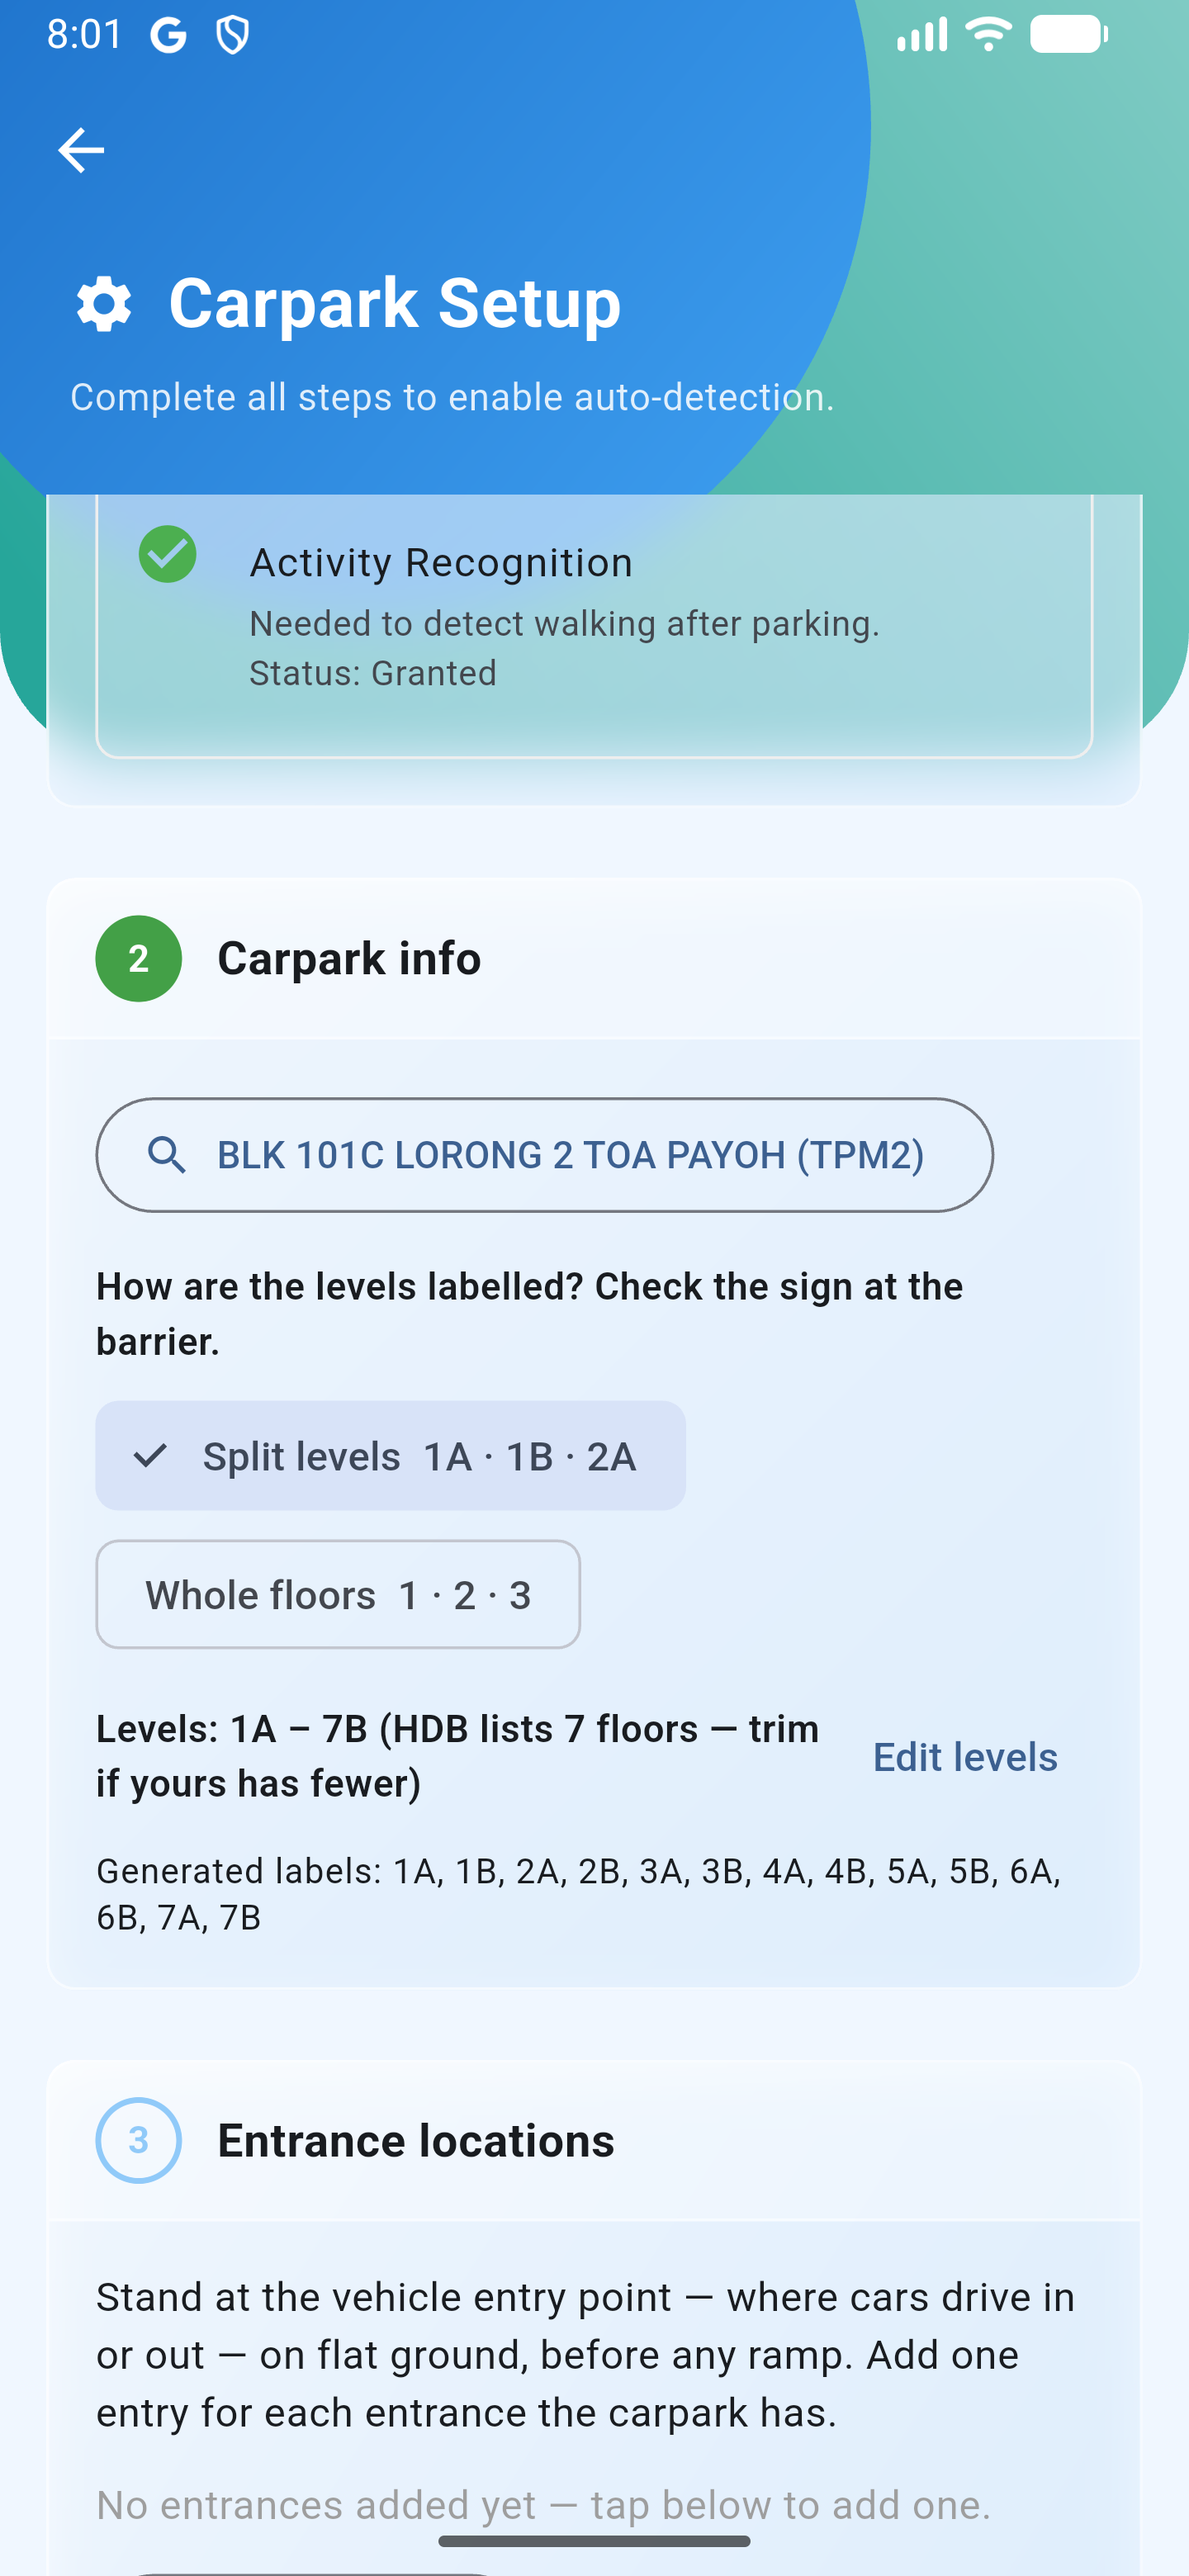
Select your carpark
Tap "Select your carpark" and pick your HDB carpark from the list — Parkmarkr fills in the name and the number of levels. Then say how its levels are signed: split levels (1A · 1B · 2A) or whole floors (1 · 2 · 3). "Edit levels" lets you trim the range or type custom labels if your carpark is unusual.
🔎 Look for "Select your carpark"
-
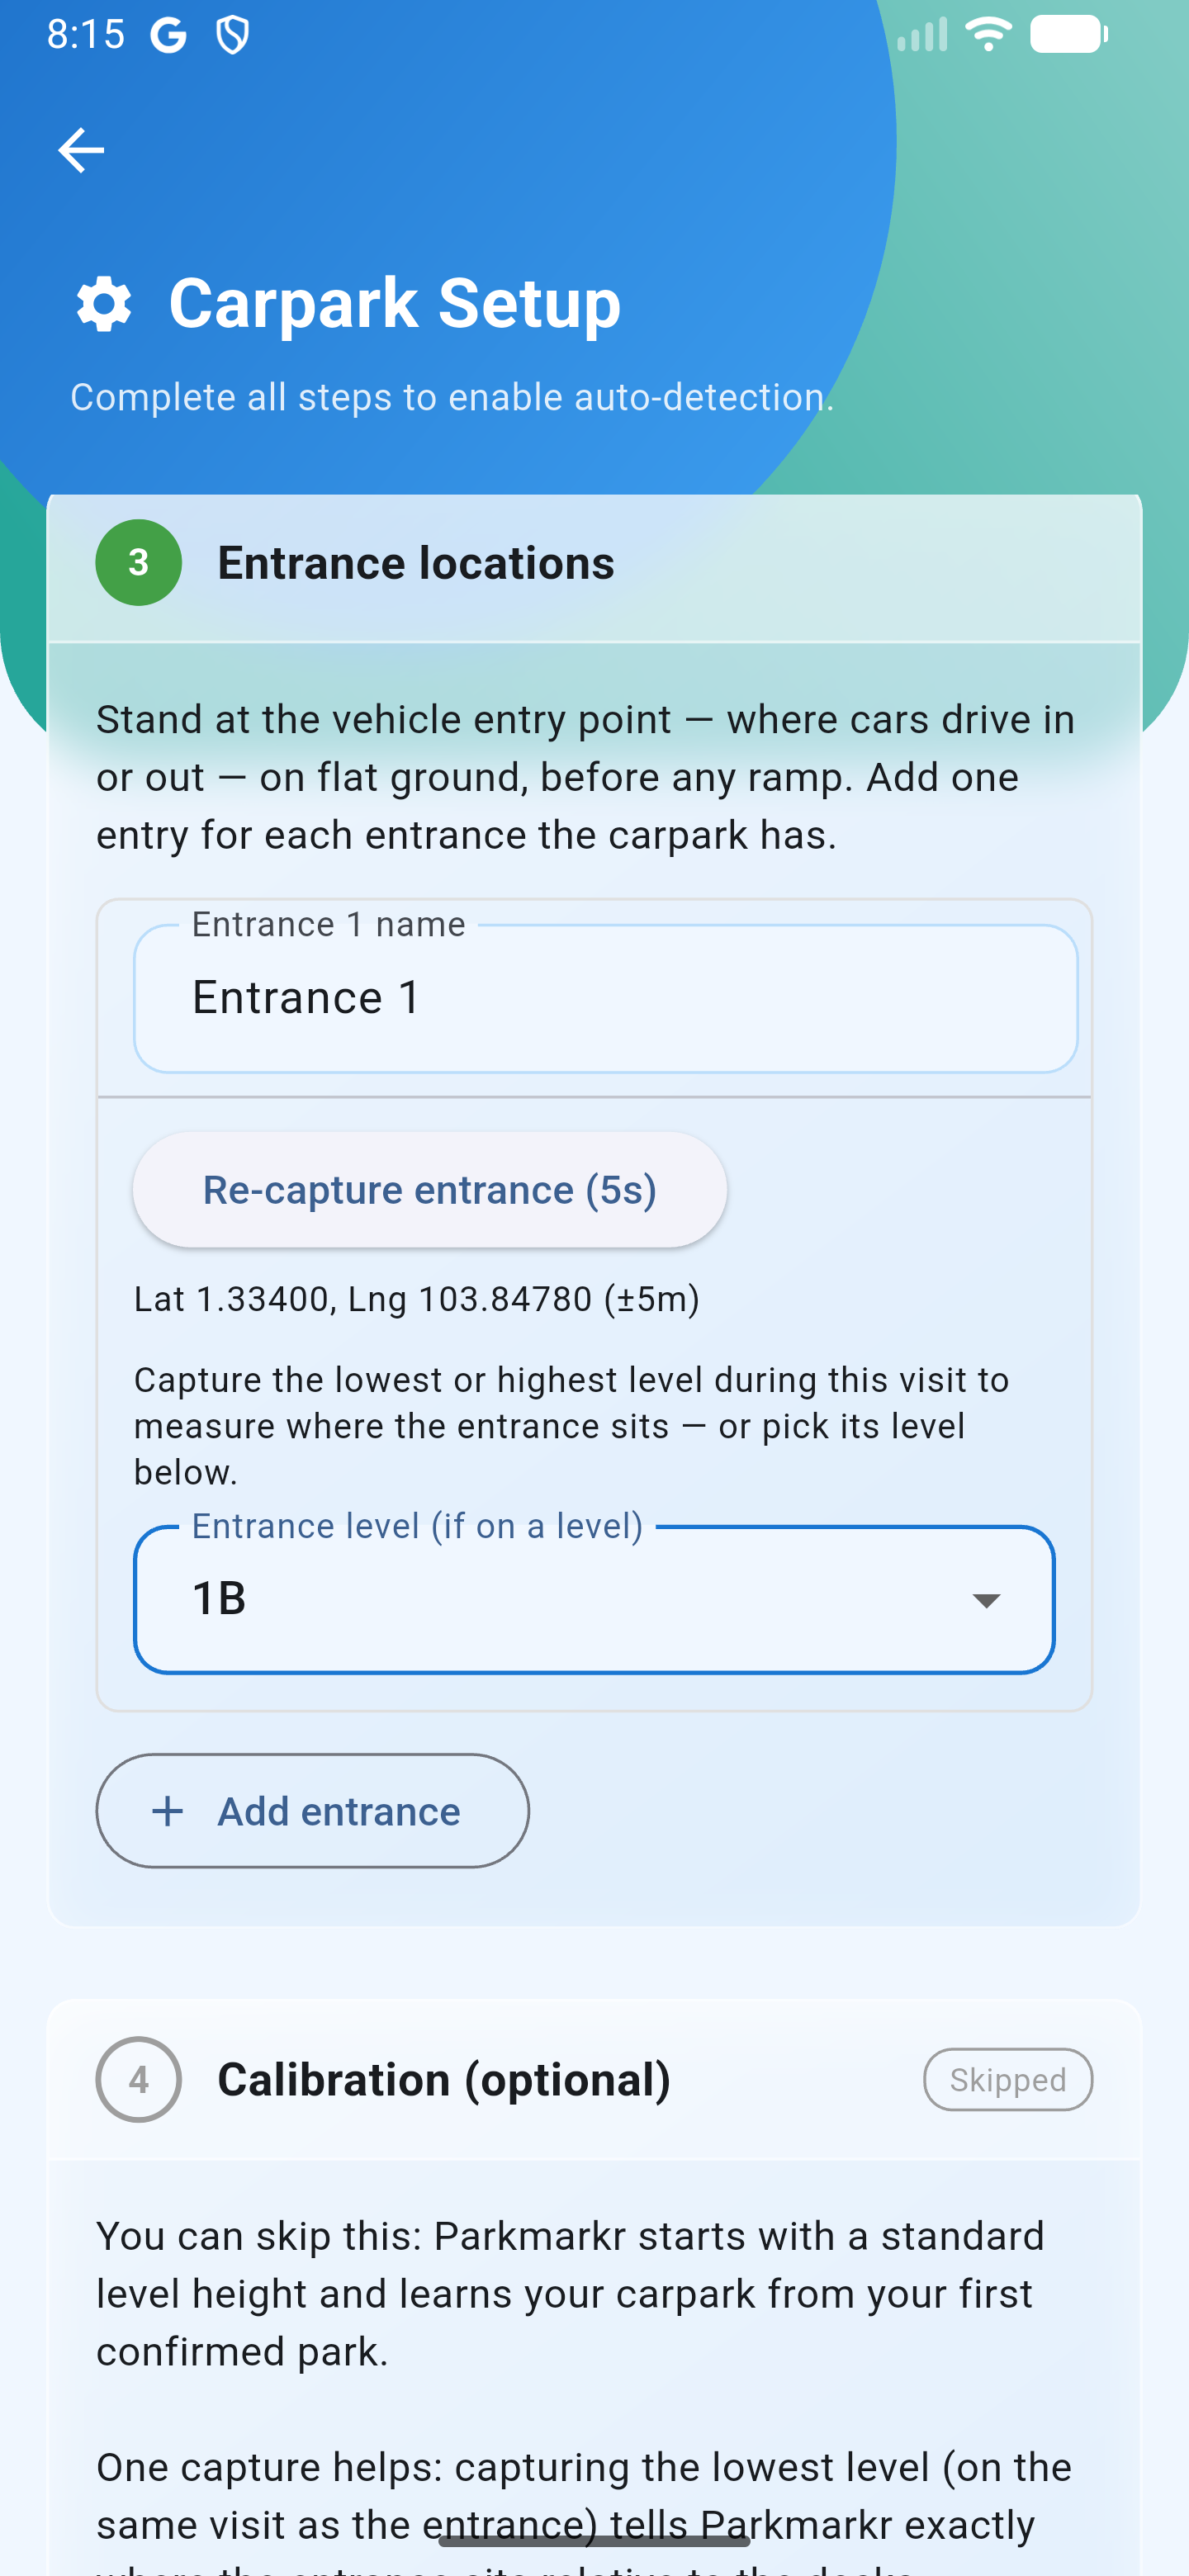 4
Stand at the entrance and capture it
Stand where cars drive in — on flat ground, before any ramp — then tap "Capture entrance location (5s)". If the entrance sits on one of the parking levels, pick that level too. Add one entry for each entrance your carpark has. This is the only capture setup needs. If the entrance already shows "From the community", other users have done this for you — nothing to capture.
🔎 Look for "Capture entrance location (5s)"
-
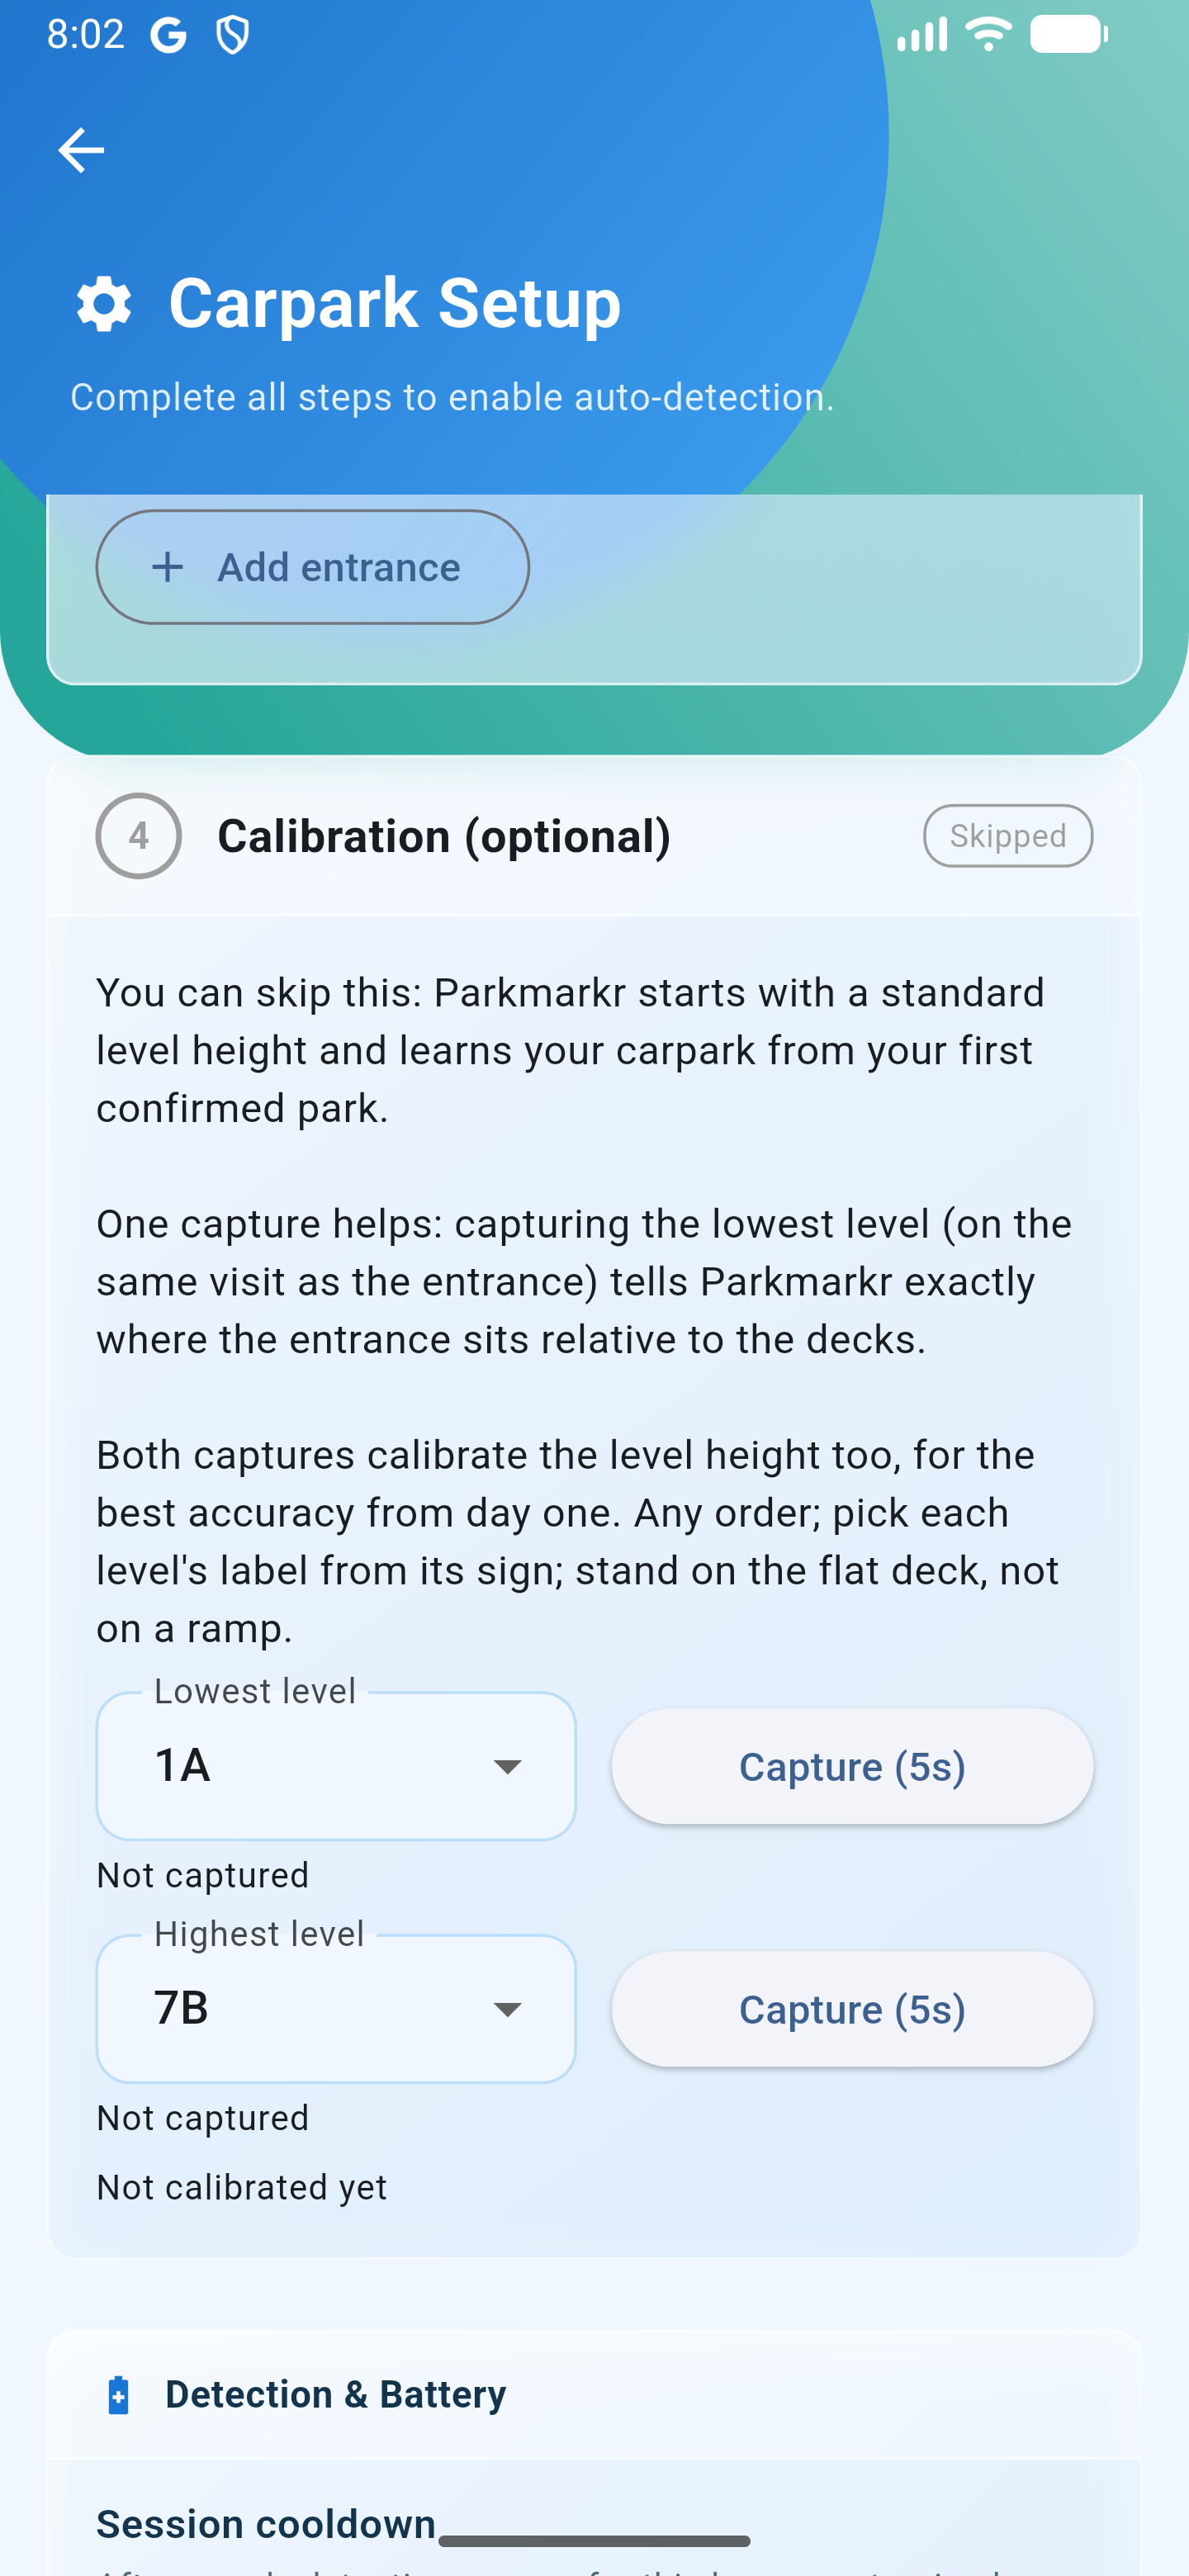 5
Optional: capture your lowest and highest levels
You can skip this — Parkmarkr starts with a standard level height and learns your carpark from your first confirmed park. For the best accuracy from day one, stand on the flat deck of your lowest parking level, pick its label from the sign, and tap "Capture"; then do the same on the highest level you can reach. Even one capture helps.
🔎 Look for "Calibration (optional)"
-
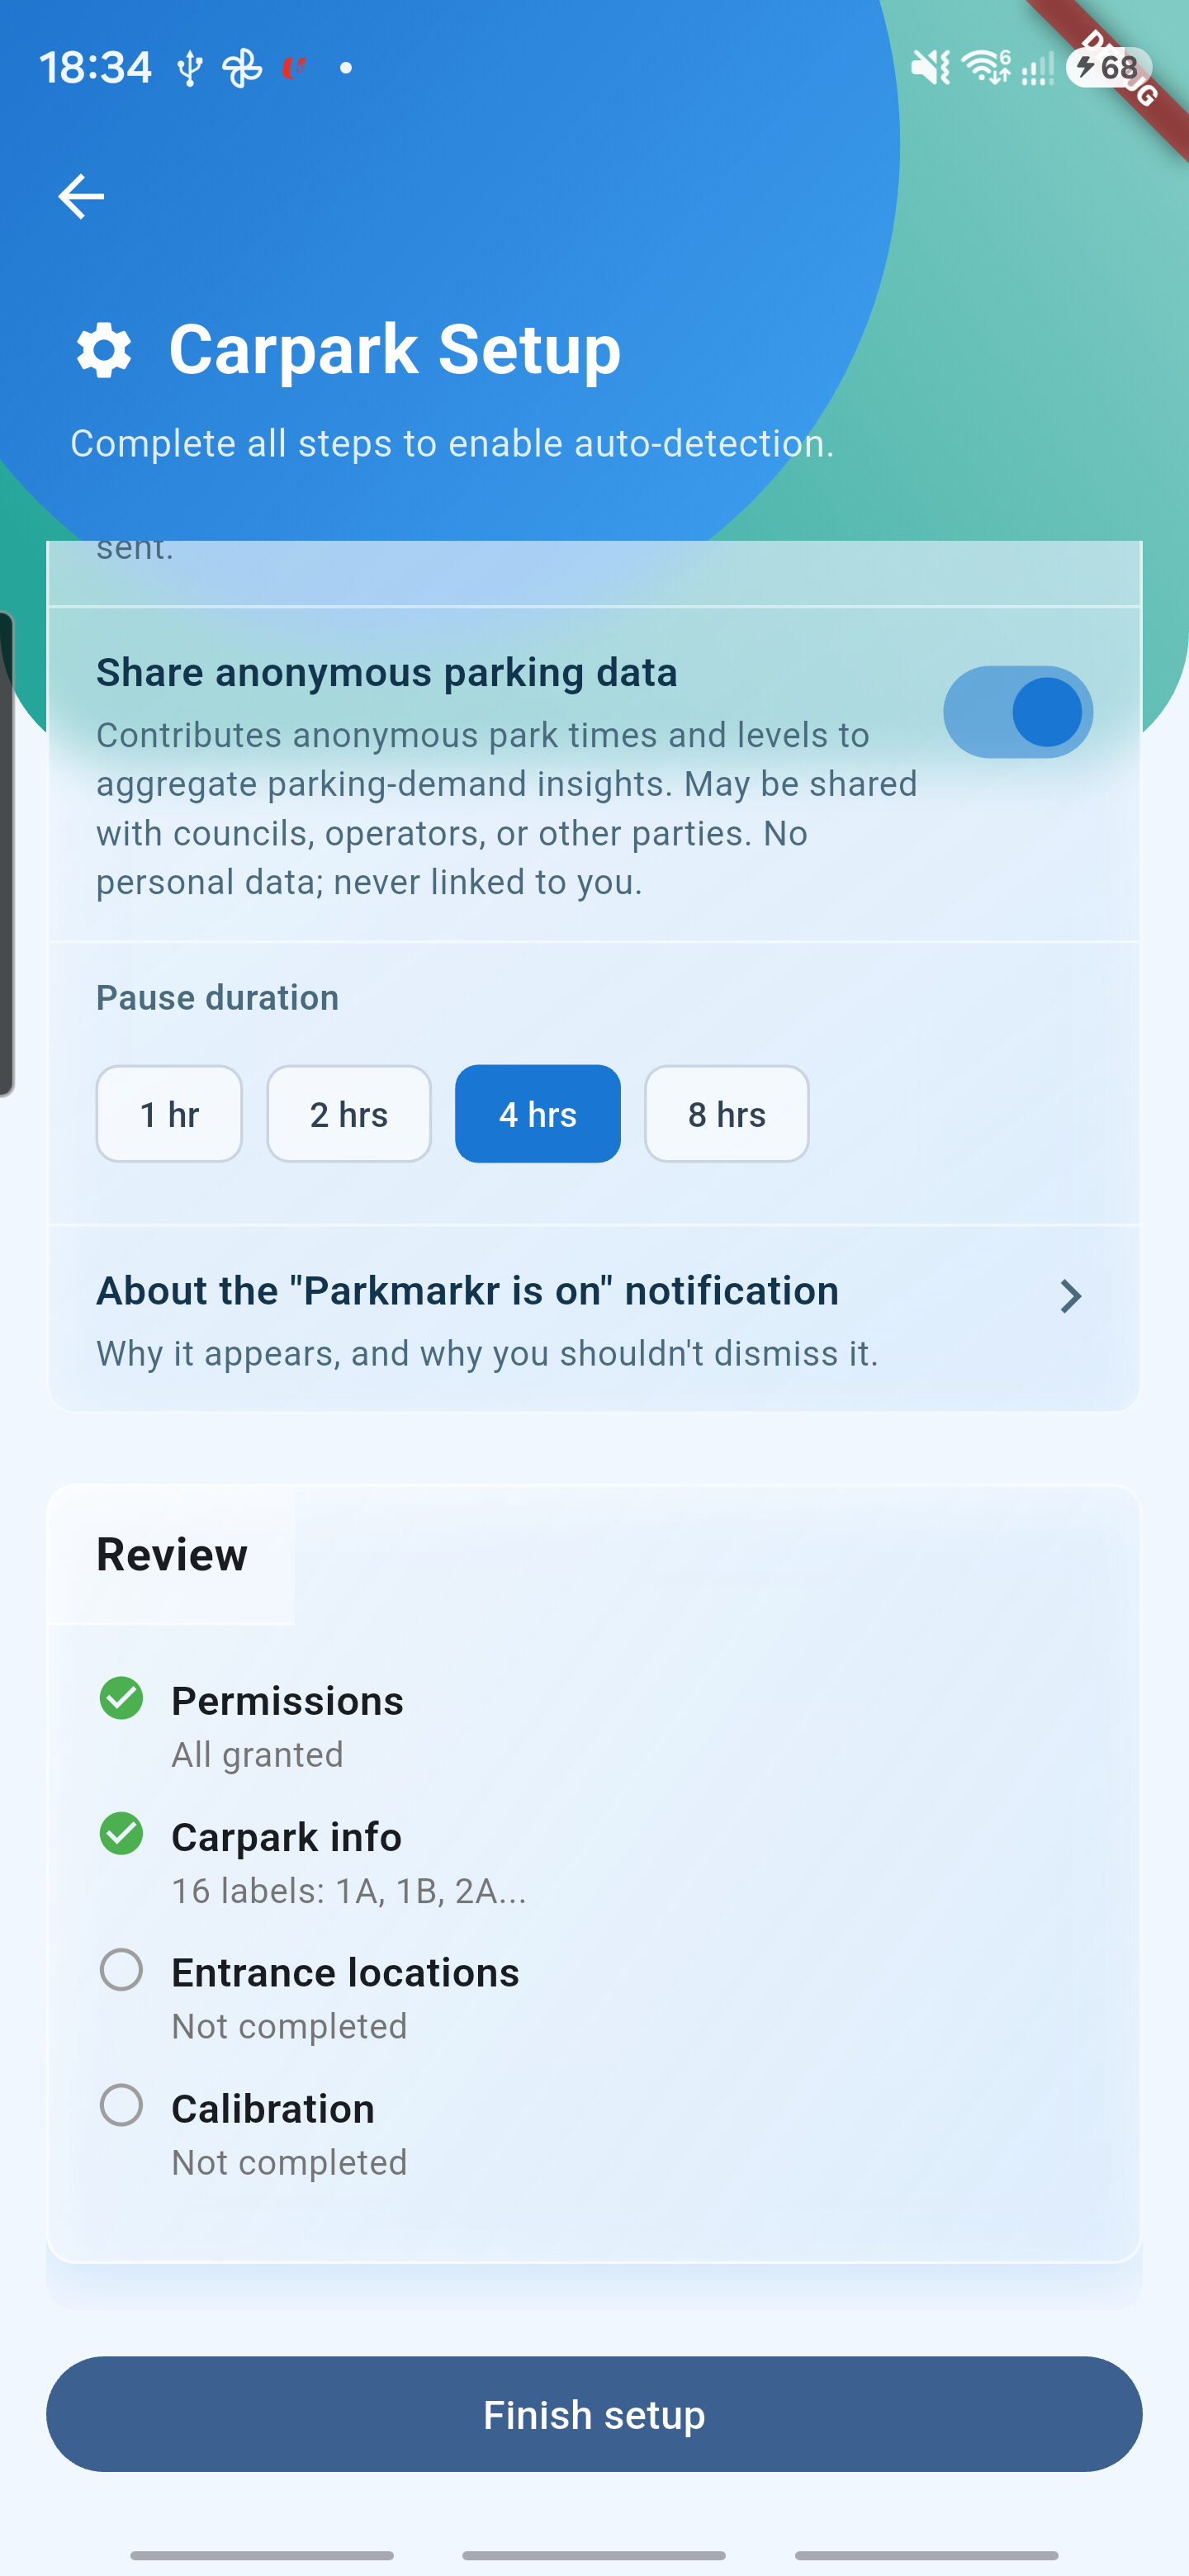 6
Review and finish
Check that permissions, carpark and entrance are ticked (calibration may show "Skipped" — that's fine), then tap "Finish setup". That's the one-time part done.
🔎 Look for "Finish setup"



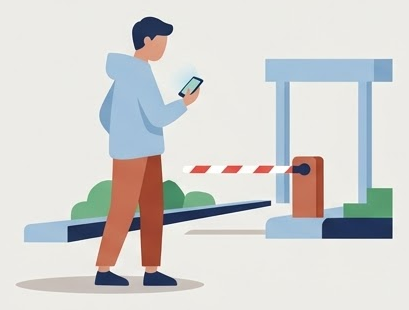

One thing to leave alone: the notification
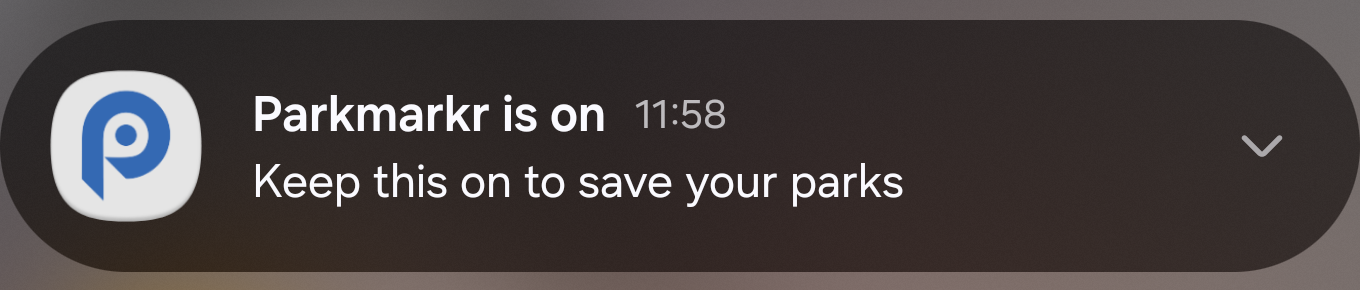
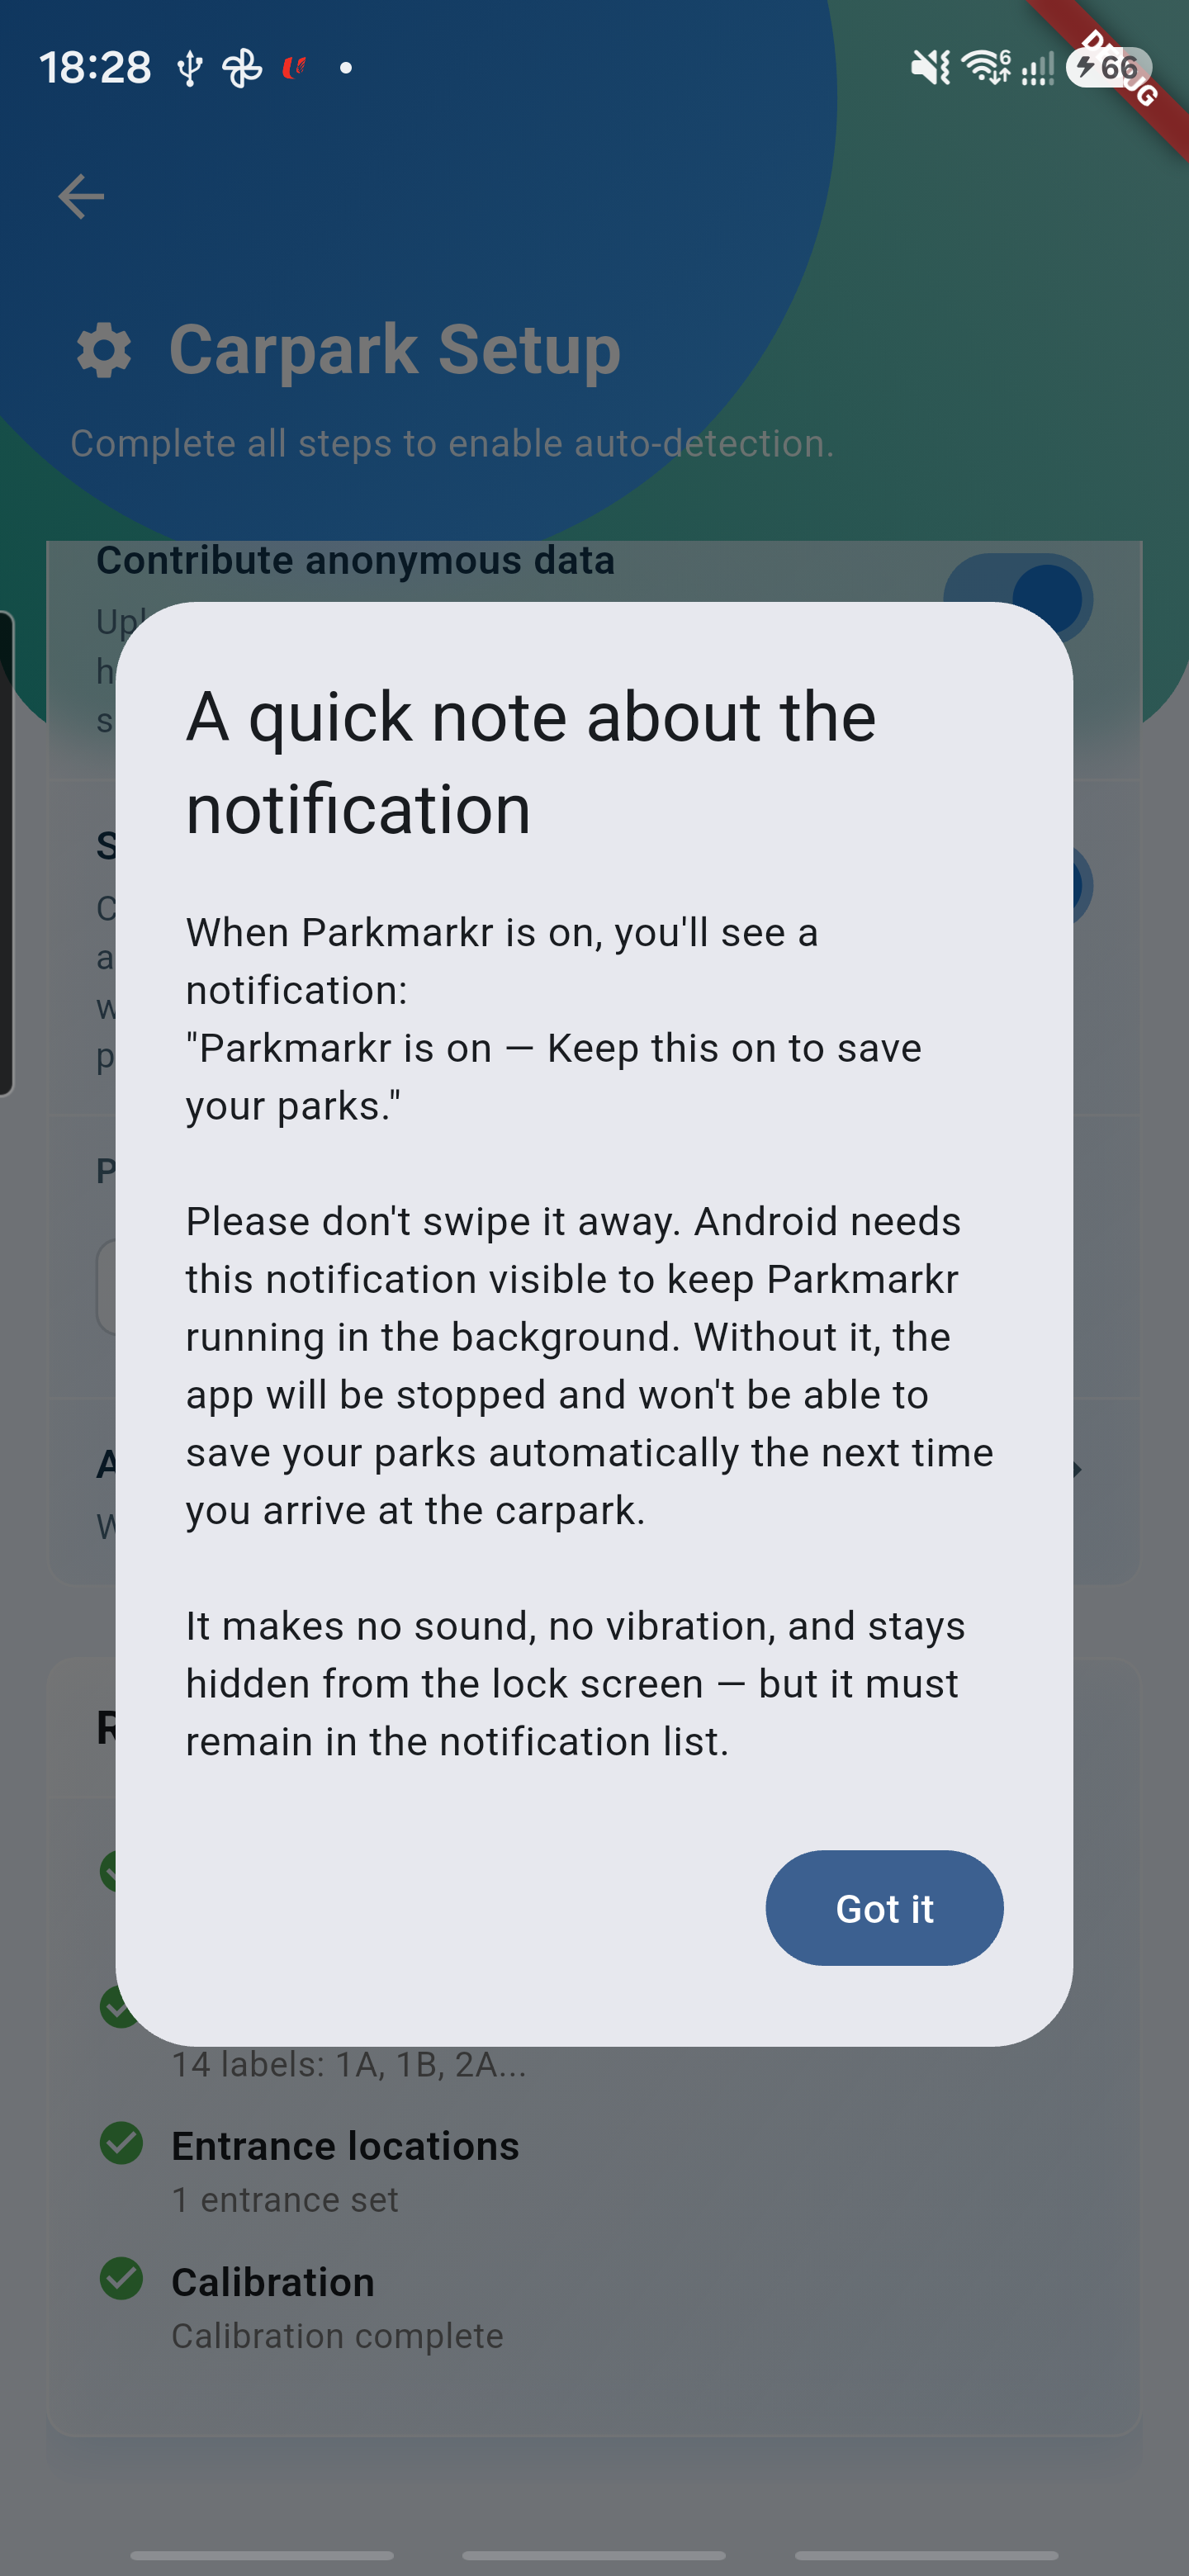
On Android, after setup you'll see a quiet "Parkmarkr is on" notification. Please don't swipe it away. It's what keeps Parkmarkr running in the background so it can save your parks. It makes no sound and stays off your lock screen. The app shows you a short note explaining this the first time.
On iPhone, there is no notification to keep. Instead, leave Location on "Always" and don't swipe Parkmarkr away in the app switcher. If you ever see "Parkmarkr paused by iOS", just open the app once.
Add as many as you like
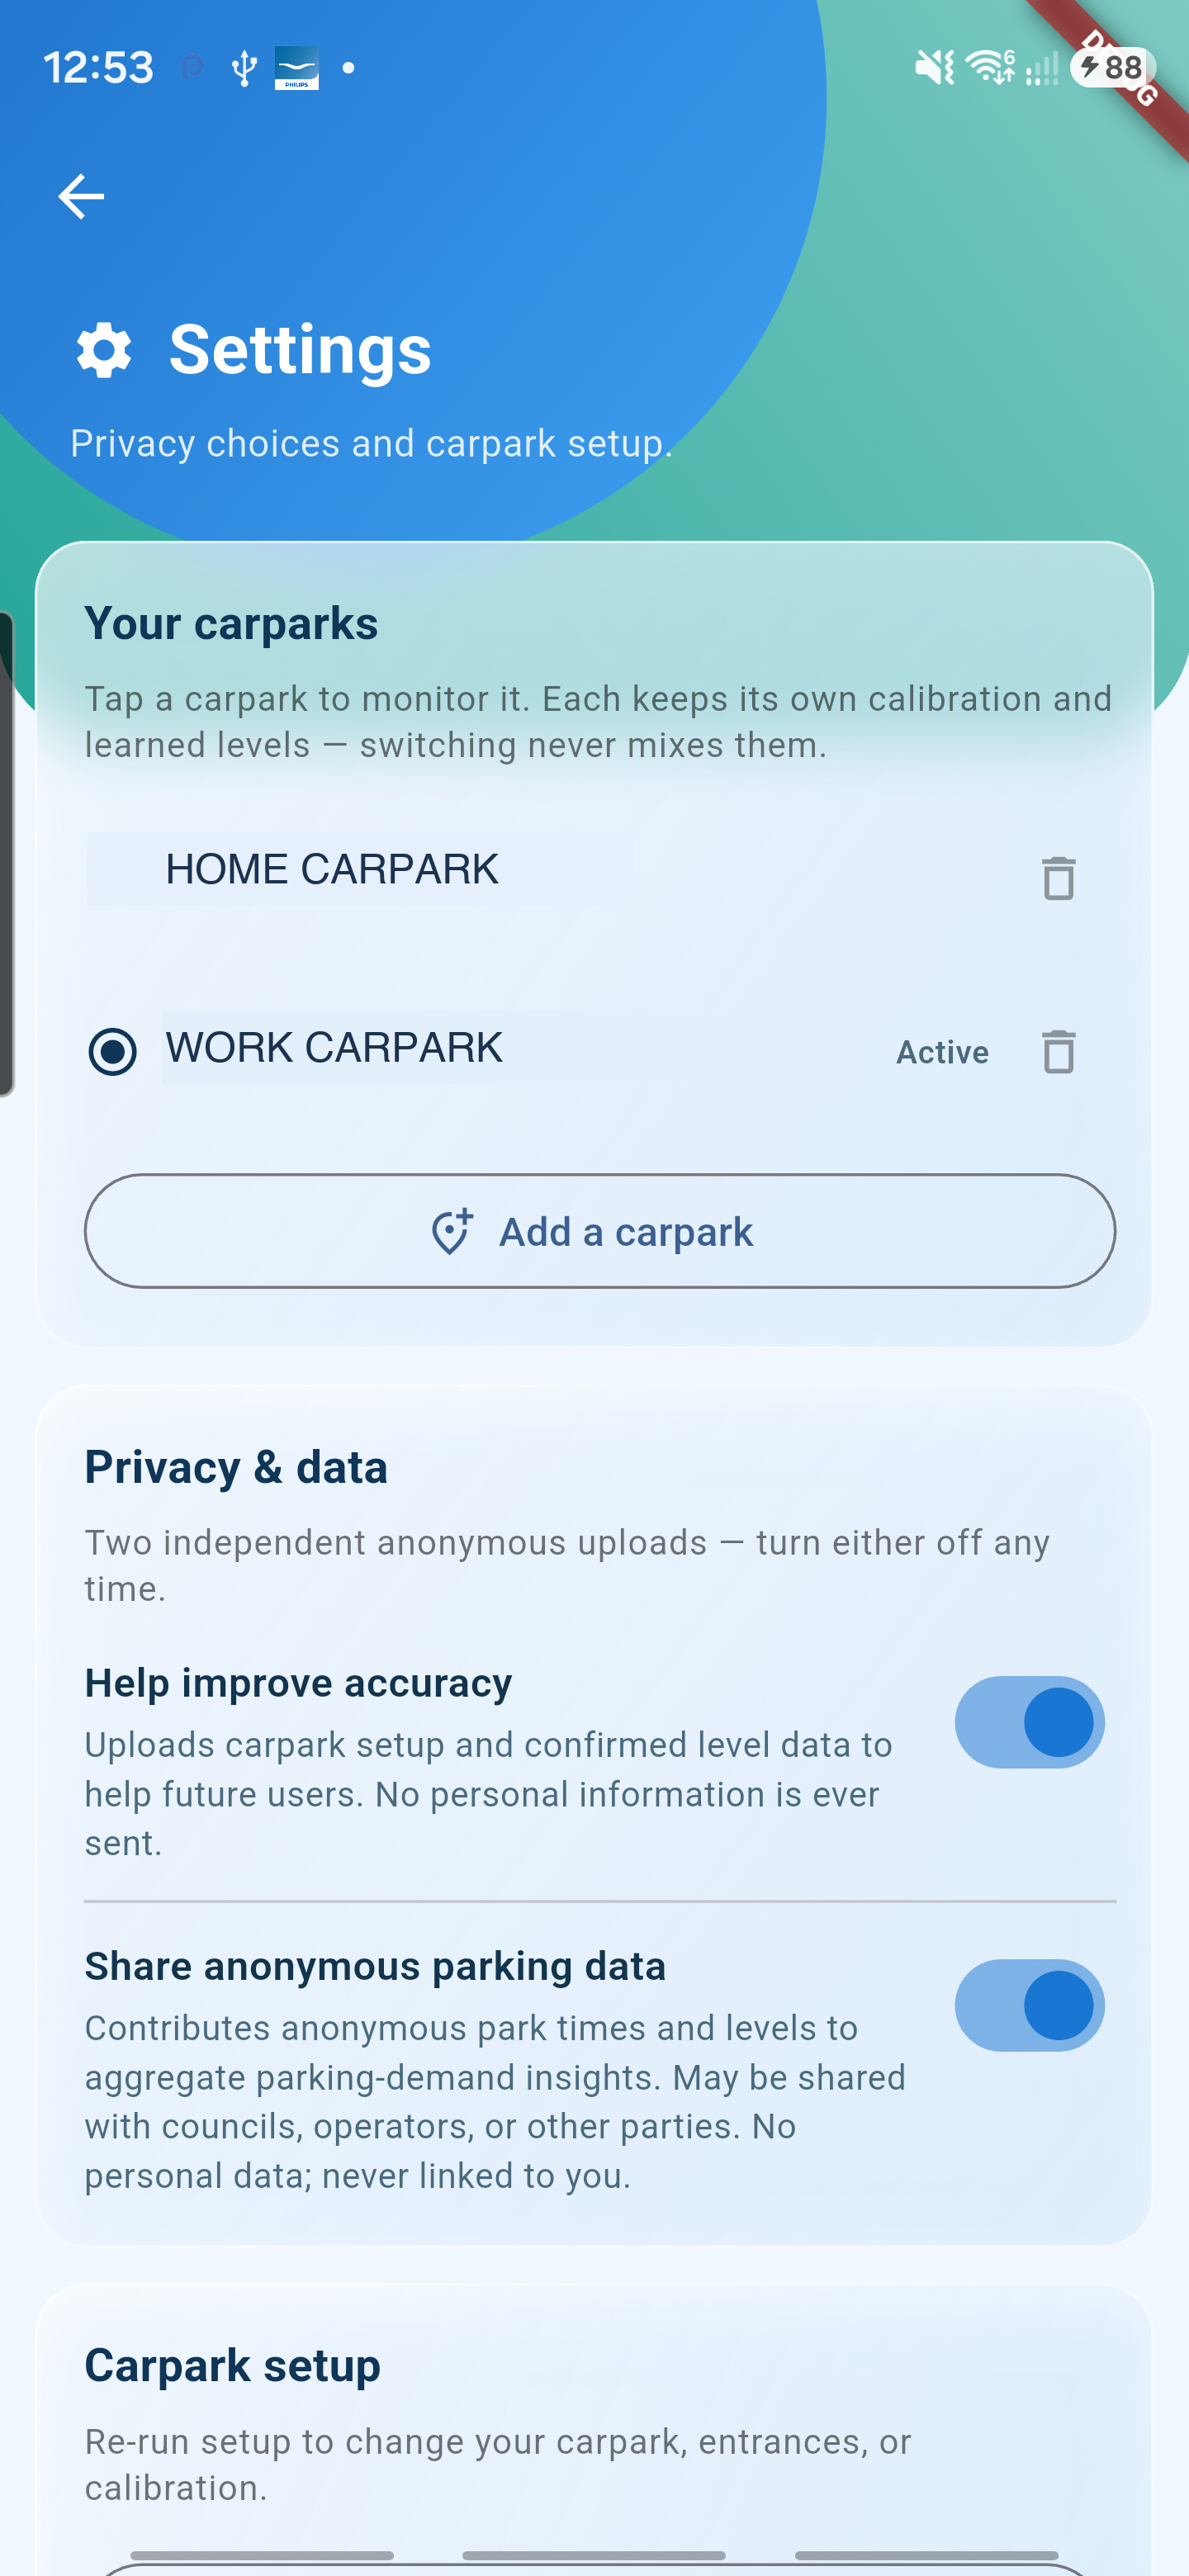
Park at home and at work? Go to Settings → Your carparks and tap "Add a carpark" — it runs the same quick setup for each one. Tap any carpark in the list to make it the active one; Parkmarkr monitors that carpark until you switch.
Each carpark keeps its own calibration and learned levels, so switching never mixes up your accuracy.
Tips for the best experience
- 💡 Complete setup while physically at your carpark — you'll need to be there to capture the entrance.
- 💡 The optional level captures take a minute each: stand on the flat deck of the lowest level, then the highest, and tap "Capture". Both give the best start; one still helps; none is fine.
- 💡 If you park at more than one carpark regularly, add each one in Settings → Your carparks — each keeps its own learned levels.
- 💡 If the app's accuracy drops over time, you can re-run setup to refresh the readings — everything you entered is pre-filled.